

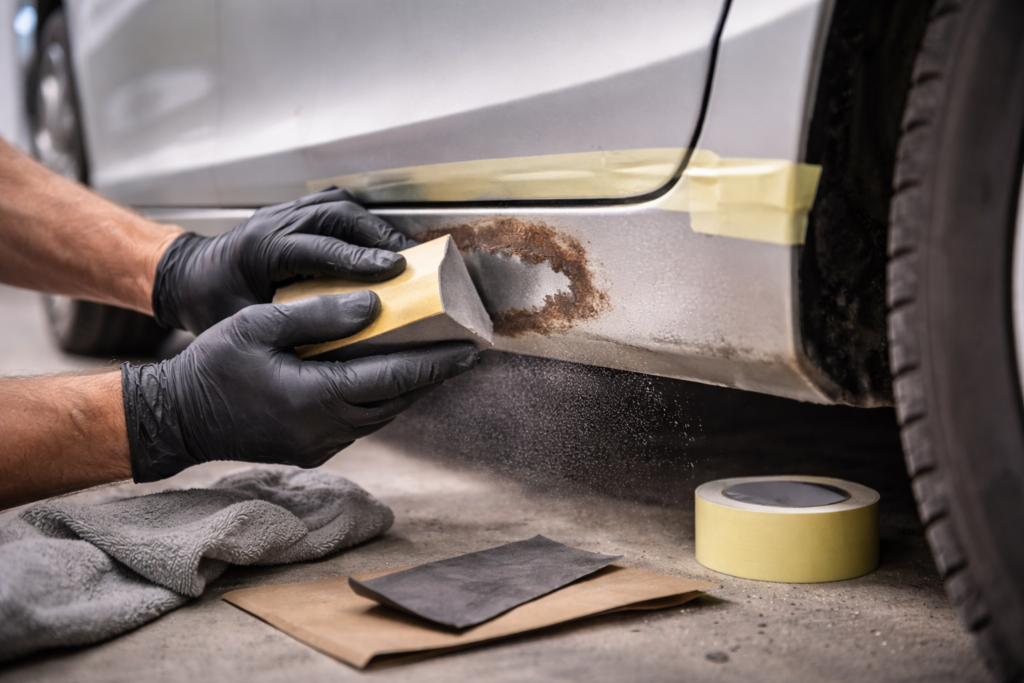
Rust on your car isn’t just cosmetic—it’s often an early warning sign that moisture has reached exposed metal underneath the surface. Left untreated, even small rust spots can spread into seams, panels, and underbody components, eventually leading to expensive repairs and structural damage.
The good news is that early-stage corrosion is usually very repairable if caught quickly and treated properly.
This guide explains what causes rust, how to identify early corrosion, and how to repair minor rust damage before it becomes a major problem.
Rust forms when metal reacts with oxygen and moisture over time. Salt, humidity, dirt, and damaged paint dramatically accelerate this process.
Once corrosion begins, the surface becomes porous and rough, trapping even more moisture and allowing rust to spread faster underneath the paint.
Salt accelerates corrosion by:
Vehicles driven near coastal regions or humid environments are especially vulnerable. Learn more about car corrosion risks and prevention strategies.
Spotting corrosion early can prevent expensive welding or panel replacement later.
If the metal feels soft, develops holes, or flakes apart easily, the corrosion may already require professional repair or welding.
You can also review these common rust warning signs.
Rust often begins in hidden areas that trap moisture and debris.
Common rust-prone areas include:
These areas should be inspected regularly, especially in coastal or humid environments.
This guide also explains the top rust-prone areas on your vehicle.
Before repairing rust, remove:
Allow the area to dry completely before sanding or treating the surface.
Use sandpaper or a wire brush to remove all visible rust until clean metal is exposed.
Start with coarse grit sandpaper and gradually smooth the area with finer grit.
Make sure you remove:
Leaving rust underneath fresh paint will usually cause the corrosion to return.
Rust converters chemically neutralize remaining corrosion and help prepare the surface for primer.
Follow the manufacturer’s instructions carefully and allow proper curing time before painting.
Use an automotive-grade primer designed for bare metal surfaces.
Primer helps:
Apply matching touch-up paint or automotive paint in thin, even layers.
Allow each layer to dry fully before applying the next coat.
Once repaired, protect the area using:
Ongoing protection helps prevent moisture from reaching exposed metal again.
Once corrosion is repaired, prevention becomes extremely important.
These DIY rust prevention tips can help slow future corrosion.
DIY repairs are best for early surface corrosion only.
You should consider professional repair if you notice:
Professional rust-proofing services can also help protect repaired areas long-term. Learn more about professional rust-proofing benefits.
Rust spreads quickly once it starts, but early intervention can prevent major repair costs and help preserve your vehicle’s safety, appearance, and resale value.
By inspecting vulnerable areas regularly, repairing chips quickly, and protecting exposed metal properly, you can dramatically slow corrosion and extend your vehicle’s lifespan.
If your vehicle already shows signs of corrosion—or you want to prevent future rust damage—professional rust-proofing and inspections can help protect your car long-term.
Visit SuperCool Southport for expert rust-proofing and corrosion protection services.
Having the right materials makes rust repair smoother and longer-lasting. Most “rust comes back” cases happen because the surface wasn’t cleaned properly, rust wasn’t fully removed/neutralised, or the paint layers weren’t sealed correctly.
These tools remove corrosion and prepare the surface so products bond properly:
Sandpaper:
80–120 grit → for removing rust and damaged paint quickly
220–400 grit → for smoothing edges and shaping repairs
600+ grit → for blending paint edges and finishing prep
Wire brush or wire wheel
Great for textured areas, corners, and stubborn surface rust—especially underbody spots.
Rust remover or rust converter (choose based on severity)
Rust remover: best when rust is light and you can sand most of it off
Rust converter: best when rust sits in tiny pits you can’t fully grind out
Rags + rubbing alcohol / wax & grease remover
This removes invisible contamination like wax, oils, and road film so primer and paint don’t peel later.
These rebuild the surface and protect it long-term:
Body filler (only if pitted) + plastic spreader
If rust left craters/pitting, filler smooths the surface so paint looks clean.
Rust-inhibiting primer (etch or epoxy is ideal for bare metal)
Primer is critical because it:
seals the surface
improves paint adhesion
adds corrosion resistance
Matching automotive paint (spray can or gun)
Use the closest match possible for a clean finish—especially on visible panels.
Clear coat (for basecoat/clearcoat systems)
Clear coat adds:
UV protection
gloss
durability against water and grime
This keeps the job neat and safe:
Masking tape + paper/plastic sheeting
Prevents overspray and helps create clean paint edges.
Safety gear: gloves, goggles, and a mask/respirator
Sanding rust and spraying chemicals creates dust and fumes—protect your lungs and eyes.
Repairing surface rust properly is all about stopping corrosion at the source, not just covering it up. If you remove the rust completely, treat the metal correctly, and seal it with primer + paint, you can prevent it from spreading and keep your car looking (and staying) solid for years.
Before you start sanding, confirm what type of rust you’re dealing with.
Inspect high-risk rust zones like:
Wheel wells and inner guards
Rocker panels / sills
Door edges and door bottoms
Undercarriage and pinch welds
Around windshield seams and trim
Boot/tailgate seams
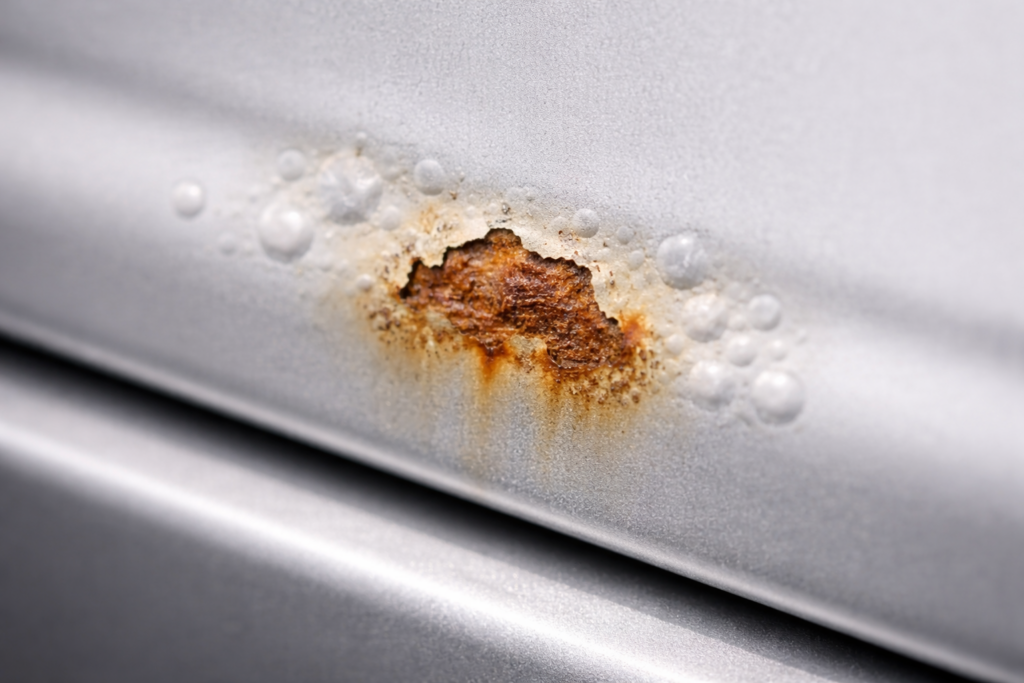
Surface rust usually looks like:
light orange/brown staining
rough texture but solid metal underneath
paint bubbling but no holes
📌 Quick test: If you sand the area and the metal underneath feels firm, it’s likely surface rust and DIY repair is realistic.
⚠️ If the rust is soft, flaky, or crumbles, or you see holes forming, it may be structural corrosion that needs professional repair (welding/panel replacement).
Rust repair fails fast if you paint over dirt, salt, or wax.
Do this first:
Wash with car soap and water
Remove all grime, road film, and salt residue
Dry completely (don’t leave moisture trapped in seams)
Best practice: Wipe the area with rubbing alcohol or wax & grease remover after washing. This removes invisible contaminants that stop primer/paint from bonding.
This is the most important step. If rust remains under the paint, it will come back.
Start with:
80–120 grit sandpaper (or a wire brush) to remove rust and bubbling paint
Then move to:
220–400 grit to smooth the area and feather the edges
Key technique: Sand beyond the visible rust spot, because corrosion often spreads under paint further than it appears.
👉 Important: You must remove all traces of rust. Even a tiny rust edge left behind can continue spreading under new primer and paint.
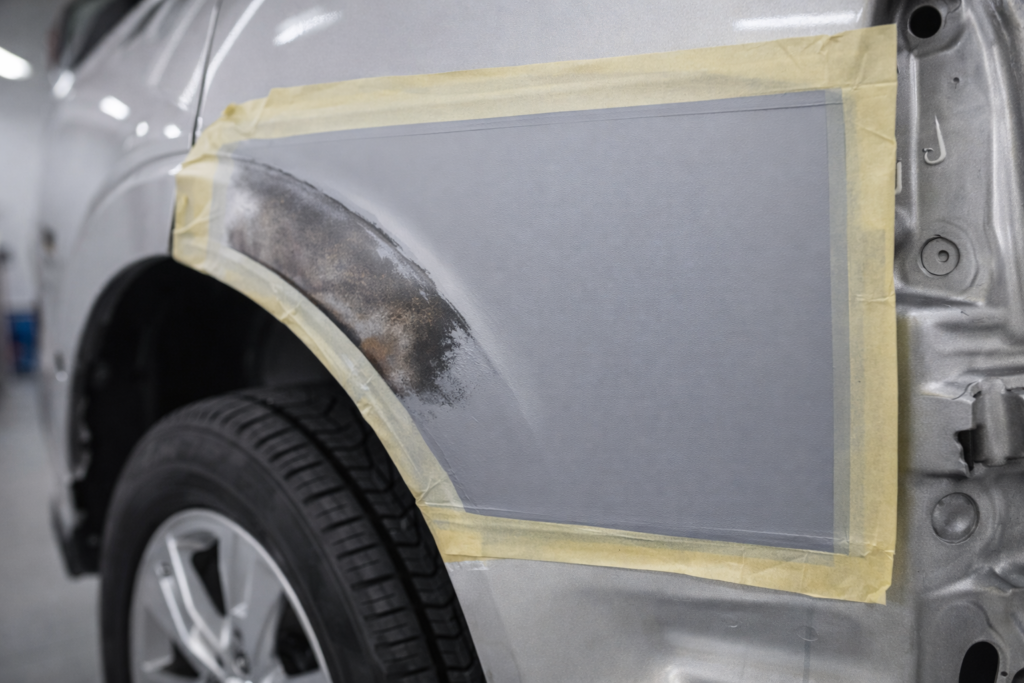
Even after sanding, rust can remain in tiny pits or microscopic pores in the metal.
You have two options:
✅ Rust converter
Converts leftover rust into a stable, paintable surface
Best for light rust in pits you can’t fully sand out
✅ Rust remover
Chemically dissolves rust (often stronger, depending on product)
Best when you want the cleanest possible bare-metal finish
Follow product instructions carefully (especially cure time). Rushing this step is one of the most common reasons rust reappears.
If sanding reveals pits, craters, or minor holes, paint alone won’t hide it—and the repair won’t look smooth.
Use body filler if:
the metal is pitted
the area has small dips or uneven texture
you want a clean, factory-like finish
How to do it:
Apply filler in thin layers
Smooth it with a plastic spreader
Let it fully cure
Sand smooth with fine grit (220–400)
📌 Tip: Don’t overfill. You want a smooth blend, not a thick patch that’s hard to shape.
Primer is what seals the repair and gives paint a proper surface to stick to.
Best choice: Rust-inhibiting primer (etch or epoxy is ideal on bare metal)
Apply:
2–3 light coats
Allow proper drying time between coats
Lightly sand between coats (optional but improves smoothness)
This step helps prevent:
peeling paint
moisture intrusion
rust returning under the finish
Now you’re restoring the colour and sealing everything permanently.
Paint tips for best results:
Use your car’s paint code for the closest match
Apply 2–3 thin coats, not one thick coat
Let each coat flash off/dry before applying the next
Clear coat (recommended for durability):
Apply 1–2 coats of automotive clear coat
This adds UV protection, gloss, and weather resistance
📌 Pro tip: Light coats reduce runs, orange peel texture, and uneven blending.
This is where your repair goes from “done” to “looks professional.”
Curing time:
Most repairs need 24–48 hours minimum before polishing
Avoid washing the car immediately after painting
Polish + protect:
Once fully cured, gently polish for smoothness and shine
Apply wax after a few days (or per product instructions) for extra protection
⚠️ Don’t wax too early—fresh paint needs time to harden fully.
DIY rust repair is great for small surface corrosion, but there’s a point where sanding and paint simply won’t solve the real problem. Once rust spreads into structural metal or forms holes, it becomes a safety issue—not just a cosmetic one.
Seek professional help if:
If you can see holes, or the metal feels thin and weak, the rust has moved past surface level. At that stage, repairs often require:
cutting out damaged metal
welding new sections
sealing and refinishing properly
Painting over this won’t stop corrosion—it will keep spreading underneath.
Rust in certain locations can compromise the vehicle’s strength and handling. Book a professional inspection if corrosion is on:
frame/chassis rails
subframe sections
suspension mounts
control arms
strut towers
brake line mounting points
These areas carry load and impact forces, so even “minor-looking” rust can become dangerous over time.
Multiple bubbles or rust patches often mean corrosion is developing in hidden seams or cavities. That can indicate:
moisture trapped behind panels
rust starting from the inside out
underbody exposure spreading across multiple points
This is where professional rust treatment and cavity protection makes the biggest difference.
A good DIY rust repair needs:
thorough sanding/grinding
correct prep and cleaning
proper primers and cure time
safe ventilation and protective gear
If you can’t complete the full process, it’s better to stop early and avoid sealing rust under fresh paint.
📌 Important: Delaying repairs at this stage can lead to major structural failure, expensive panel replacement, and a much bigger repair bill later.
Even after you repair corrosion, prevention is what stops it from coming back. These simple habits make a huge difference long-term:
Especially after:
rainstorms
beach trips
muddy driving
off-road use
Focus on the wheel arches and underbody, where grime sits and moisture stays trapped.
Stone chips are one of the most common ways rust begins. Sealing exposed metal early prevents corrosion from spreading under the paint.
Wax adds a protective layer that helps repel water and reduce contamination buildup—especially helpful in humid or coastal areas.
Rust-proofing is highly recommended if you drive:
near the coast
on gravel roads
in high humidity
off-road or through mud/water
Oil-based protection is especially effective for seams and hidden cavities.
Mudguards reduce splashback and stone impact in wheel wells—two major causes of rust around arches and rocker panels.
Catching and repairing rust early is one of the smartest things you can do as a car owner. With the right approach, you can stop corrosion in its tracks, protect your vehicle’s structure, and avoid thousands in long-term repairs.
Whether you’re a weekend DIYer fixing small surface spots or someone looking for long-term protection, taking action now always pays off later.
If you’d rather skip the sanding and spraying—or you want a professional assessment before rust spreads—visit SuperCool Southport for expert rust inspections, repairs, and protection services in Queensland. Their experienced technicians specialise in rust removal, rust-proofing, and long-term vehicle protection, ideal for Australia’s coastal and humid conditions.
👉 Book your rust repair service today before minor corrosion becomes a major expense!
Supercool Car Air Conditioning © 2026 | Designed and developed by 123 Digital |Privacy Policy | Blog

No: AU01712